
Introduction
Information Architecture (IA) is the structural design of shared information environment (source: Wikipedia).
In this series on Information Architecture, we discussed how a bad IA can affect your SharePoint success.
If your SharePoint users can’t find the information they need quickly, they’ll get frustrated.
In our first article, we explained why trying to create an IA that has only one dimension leads to creating the lowest common denominator IA instead of giving your users the best-of-breed experience they deserve.
Our second article explained how you should build an IA on 3 dimensions. We described how the physical IA should cater to authors. If you don’t create an IA that allows your authors to place content in the right place, you’ll end up with messy, unstructured data. Yes, it is data, not information, because it loses all meaning.
In the last article, we looked at the logical IA. While the physical IA caters to your authors, the logical IA should cater to your readers.
But there is one more dimension to consider: the metadata dimension.
The metadata dimension
The metadata dimension of IA helps the system deliver information for specific purposes.
For example, imagine that the HR department has a document library for their HR policies. Before employees can see the latest version of a policy document, they must be approved.
Marie the HR Manager is responsible for approving HR policy documents.
When she launches SharePoint, her HR site tells her how many documents are waiting for her approval.
If Mary clicks on a document waiting for her approval, it takes her directly to the document. From there, she can approve or reject the updated policy document.
SharePoint does not keep documents waiting for Mary’s approval in a separate physical location. Yet, from Mary’s perspective, SharePoint appears to bring all documents waiting for her approval in one convenient place for her.
In other words, the physical location of her documents doesn’t change. SharePoint uses the metadata to identify which documents need Mary’s approval. SharePoint then presents the documents in a separate logical location.
That’s what creating the metadata IA is all about: making sure that your documents have the metadata they need to support specific goals.
You might say "Ok, I get it, so we just use the goals we identified when we [designed to logical IA]( (https://tahoeninjas.blog/2019/02/22/information-architecture-in-sharepoint-the-logical-dimension/) and create the metadata we need to support it?"
Well, yes …and no.
(Remember, I’m a consultant. The answer is always "It depends")
Progressive Disclosure
In user experience (UX) design, there is a design pattern called Progressive Disclosure. It is a strategy for managing information complexity by gradually (or progressively) revealing more information as users indicate they wish to see more.
In other words, show only the information that is necessary at every point of interaction.
By reducing the amount of unnecessary information you show to users down to the essential, you make it easier for users to make sense of that information.
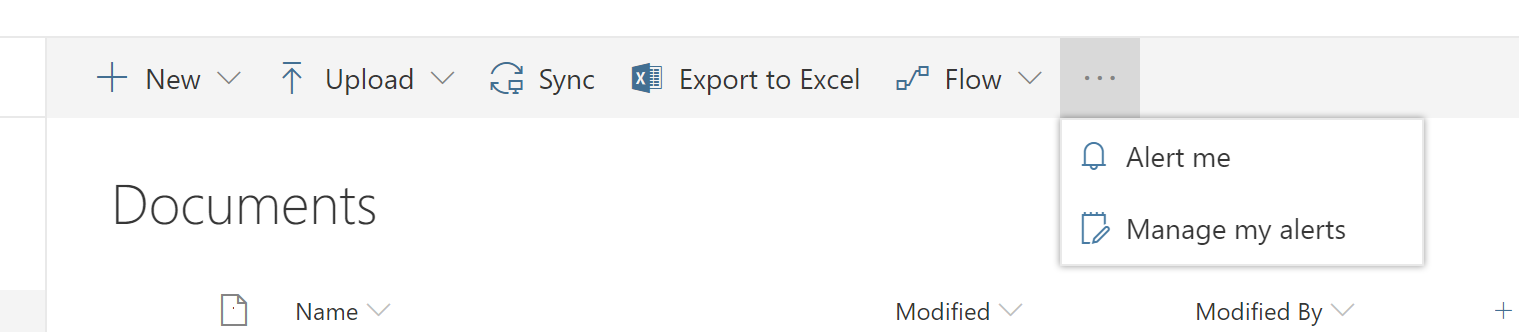
You see this all the time when using SharePoint. For example, the More button in the document library toolbar is a form of progressive disclosure. We don’t need to show every single option in the toolbar. We only need to show the most common options. If users tell us they want to see more choices, we reveal more options.
The News web part in SharePoint works the same way. When you go to a team site or communication site, you see the latest news. If users want to see more news, they can use the See all link, in the upper right corner.

Summary, List, Details
When designing your metadata IA, you should consider creating the metadata structure required to build progressive disclosure in your design.
An easy way to do this is to present the information in 3 distinct views:
- Summary
- List
- Details
We’ll describe each view below.
Summary
As you evaluate every actor goal, ask yourself:
What is the least amount of information that this actor will need to meet their goal.
Another way to ask this question is:
How do I summarize the information this actor needs to meet their goal quickly
In our example, Mary the HR Manager needs to know quickly when documents need her approval.
We don’t need to show her every single document. We just need the documents that have not been approved yet.
Keeping this in mind, we don’t even need to show the Size, or Date Created. We probably only need the document’s Title, Date Modified, and Modified By.
When building a summary view, consider providing the user information that will help them prioritize their tasks. For example, we can show Mary the list of documents that have been waiting for her approval the longest. Or, we can show the list of documents by how recently they were submitted for approval.
Every summary view should allow users to do at least two things:
- Get the full information about an item in the summary (a.k.a. the Details view)
- Get the full list of items (a.k.a. the List view)
Both are discussed further below.
How do I sort my summary view?
Almost every client engagement I work on, there is at least one business stakeholder who insists that their summary view of [whatever] must be sorted alphabetically — from A to Z.
Their argument is usually "people need to be able to find [whatever] quickly. Sorting by alphabet is the fastest way to let them find it".
It may be a good approach for a list view of [whatever], but the summary view should boil it down to what matters now.
Instead, consider showing the list of latest [whatever]. Sorted in reverse descending date (i.e.: newest first). Doing so will allow repeat visitors to see the newest [whatever]. If they scan down the list, they may eventually see an item that they’ve seen before and assume that they have seen everything below that item.
Consider the alternative: users have to scan through the entire list of [whatever] to see if there is anything new.
How many items in my summary view?
There are no set rules for the number of items to show in a summary view. Luckily, there are brilliant people who have done some research on this.
The first rule is known as Miller’s Law. In summary:
The average person can only keep 7 (plus or minus 2) items in their working memory.
Miller’s Law is often misinterpreted. It doesn’t mean that you should only present 7 (+/- 2) items only. If you need to present more, consider chunking the information into groups of 7 (+/- 2) items.
The second rule is Hick’s Law. Hick’s law says:
The time it takes to make a decision increases with the number and complexity of choices.
In other words: the more choices you give people, the longer it takes for them to make a decision.
So, when I build a summary view, I try to limit it to 7 +/- 2 items.
Sometimes I show 5, sometimes I show 7, and rarely I’ll show 9 items. If I need more than 9 items, I’ll always try to group the items into subsets of 5-9 items.
The more information I need to present with each item, the fewer items I’ll show in my summary view.
Doing so will ensure that every user can make sense of the entire list and that they will make a decision quickly.
List
The list view allows users to view all items, possibly without filters or restrictions.
But don’t think that you can just create a All items or All documents view and be done with your list view.
Keeping your user’s goals in mind, you should design one or more list views to help your users accomplish their goals quickly without having to scan through the entire list of items.
For example, I’ll often create views like:
- Latest [whatever]
- My [whatever]
- [Whatever] waiting for my approval
- [Whatever] by approval status
- [Whatever] about to expire
…and the list goes on.
As with the summary view, you need to consider what metadata you’ll need to support each list view.
Every item in the list should provide users with a link to the Details view for that item.
Details
The details view should provide all the information needed on an item so that users can achieve their goals.
Most often, the details view for a document is really the document itself — because, most often, the user’s goal is to read the document.
Sometimes, you need a different details view. For example, let’s say we want to allow executives to do a second-level approval for expenses that approved by managers who report to them.
Instead of showing the full document, we’d need to show the expense summary, amount, manager’s approval, and approval date. The view would probably make it easy to approve the expense without having to open it.
Keeping in mind progressive disclosure, and providing users with Summary, List, and Details views of information will help your users make decisions quickly and accomplish their goals.
Implicit metadata
If you’re planning an IA to migrate a network file share to SharePoint, heed this warning:
Don’t simply relocate document. The location of a document in a file share is a form of metadata that you may lose if you relocate documents.
That’s implicit metadata.
Let’s say that your file share contains legal cases for case management purposes. You have a folder for every case your company has ever processed.
Because of the large number of cases your company processes every year, there is a folder for every year in your file share. Cases are then placed in their respective folders, according to when you received the case.
Your company gives each case a unique number, e.g.: CA123456. To ensure privacy, case numbers do not convey any information about who the case parties are.
To make things even easier for your users to work through open cases only, your network file share groups every year folder into an Open cases, Closed cases, and Pending approval.
The folder structure looks as follows:
- Cases
- Open case
- 2017
- CA123456
- CA123459
- CA123464
- …
- CA123456
- 2018
- CA133456
- CA123559
- CA121464
- …
- CA133456
- 2019
- CA233456
- CA323359
- CA124464
- …
- CA233456
- 2017
- Closed cases
- 2017
- …
- 2018
- …
- 2019
- …
- 2017
- Pending approval
- 2019
- …
- 2019
- Open case
Because the documents you want to migrate are in a network file share, there may not be a lot of metadata — if any — for your documents.
But if you look carefully, the location of each document provides implicit metadata about each document: the status of the case, the year the case was received, and the case the document belongs to.
If you migrate your file share to SharePoint, you need to consider a way to apply the implicit metadata to each document.
You might say: "If I keep the same folder structure, I won’t lose the implicit metadata". Sure, but what happens when users are looking for a document and use search? The only way they will be able to see that implicit metadata about every document in their search results is if they look at the document location for every. single. document.
Conclusion
As I have hopefully conveyed in today’s post, you need to consider your metadata IA structure to support your users’ goals.
The metadata dimension also needs to support both the physical and logical IA.
In my next post, I will explain how to put all this theory together using SharePoint’s capabilities.
For More Information
- The Most Important Rule in UX Design that Everyone Breaks, Jeff Davidson
- Miller’s Law, Laws of UX
- Hick’s Law, Laws of UX


2 Comments
Pingback: Information Architecture in SharePoint: The Logical Dimension – Tahoe Ninjas
Pingback: SharePoint Migration: Mind the URL Length – Tahoe Ninjas